A Beginners Guide to Home Studios: Part 3
- Mar 6
- 23 min read
Studio Monitors & Set-up
Written and Edited by: Saige E. Davidson, MOSMA Outreach Coordinator, 2023 Alumni
Published: Mar. 6th 2026
Now you almost have your own home studio! Just a couple more pieces left!
Monitor Speakers are the next thing I would recommend you set your sights toward. Particularly if you do plan on mixing anything. Without them, you will likely run into the issue of your mix sounding like it was “mixed with headphones”. For me this sounds like an imbalance in the mix, but that doesn’t feel to me like a good enough explanation, so I asked the teachers here at MOSMA how they would explain this phenomenon.
Here is what professional mixing engineer, Ryan McVeigh had to say:
“Mixing on headphones alone may distort the listener’s perspective on certain mix elements. For me, those are the balance of lead instruments (vocals, namely) against the backing, and, perhaps more significantly, the correct low frequency amount and clarity of the mix.

Often, when a song is mixed solely on headphones, low frequencies are easily exaggerated. I speculate this might be due to how that range behaves in an acoustic space, and that behaviour just isn’t as apparent when low frequencies are directed straight into the ear canal. Head resonances may also contribute to this when wearing headphones, which may be why open-backed headphones can help a bit.
Vocals, as well, tend to be louder and out of context with the rest of the mix. Perhaps because it is most often placed centre, arriving in both ears at the same time.
All this is to say, there is a time and place for headphone usage. Towards the end of the process, headphones are an excellent way to assess fades, noise, reverbs/effects.”
For the most part, our ears tend to dislike this imbalance. It can sound a bit overwhelming, off, and maybe even a bit unnatural . You may find yourself comparing your mix to one done on monitor speakers and wondering why it just isn’t quite there yet, despite it sounding pretty darn good on headphones, and so a good pair of studio monitors will save you a lot of time, energy, and grief trying to figure out what your mix is missing.
Mixing, for those less familiar with the terminology, is simply the process of balancing individual elements using various tools, so you may hear each part clearly, then adding effects such as reverb, delay, overdrive, etc. This is a process that takes a great amount of time and patience to learn, as you have to train your brain to be able to pick out what may be a problem in a mix. You are also training your brain to know what effects can be added to one song or another, so it does help to maintain and nurture creativity.
The importance of this step in music production is a big reason why I consider a pair of studio monitors so essential to anyone involving themself in any form of audio production. Think of an orchestra, and how the conductor and musicians together can create a perfect balance between each instrument. Well a mixing engineer isn't too unlike that conductor, and they are both approaching music with a very similar overarching goal: To make the music pleasant to listen to for most people.
How do you choose your monitors?

Similar to headphones, when picking out studio monitors, the flatter/more neutral the frequency response, typically the better they are for mixing. The clarity it provides helps make muddiness and other potential problems more noticeable to the ear. This isn’t always the case (as per usual in the world of audio). There are most certainly studio monitors that, while terribly hard to mix on, can help make your mix sound fantastic if you do succeed in making it sound good, however if you're just starting out, I would recommend you take some time to train your ears a bit before tackling that particular challenge. It can be easy to get discouraged when you first start something, so if you have the ability to do so, why not make it as easy as possible for yourself?
Also, like headphones, you will likely want to hear them first. Most stores that sell them will allow you to listen to your music through them before purchasing. These stores typically will have good return policies as well, so if you do need to hear them in your space, you can always purchase them and then return them should you decide against them. Renting is also a perfectly valid option; especially if you only need them for a few days at a time. When I was still working for Long & Mcquade, people would rent all sorts of gear for projects!
Due to the variety of ear shapes and individual experiences, it is a fact that sound is quite subjective. Now this isn’t saying that there isn’t any commonality in what people perceive as ‘sounding good’. Sound certainly has a theory. Hearing your tools before you buy them —or in many cases, before you decide if you want to keep or return them— is an important step in getting the right tools for you.
To expand upon what I mean by flat: You want them to sound good, but you don’t necessarily want them to have much of a bass boost, or a sparkly high end. You could work with it, but if you can choose, then you might as well choose exactly what you need. Many engineers will even have several sets of studio monitors they will choose for specific qualities, or simply because they have many engineers cycling through their studio.
When you go to test them, I recommend picking a song you are very familiar with, and comparing how you’re used to hearing it with how you hear it through the speakers. Ideally choose a song that you know has been well mixed. Pop songs can actually be fantastic for this due to the high production done on them. Even if you're not a big fan of pop, you're still looking for a song with a certain level of production quality, so you can actually hear how the monitors handle various frequencies. With any good set of mixing speakers, the song will most likely sound more open and detailed. You may even hear things you didn’t even notice beforehand.
What size of studio monitor do I want?
This question has less to do with the space the speaker cabinet takes up, and more to do with the size of the speaker cone. Of course, the cabinet is incredibly important, as they contain and focus the sound; and, in studio monitors, help to eliminate resonance, but when Audio engineers talk about speaker size, we are talking about the size of the largest driver.
If you can, visualize the tiniest speaker you have ever seen. Maybe this is one of those crunchy little office speaker sets. Maybe your phone speaker, or the speakers built into your laptop, then, try and remember what they sound like.
Probably not too great. I imagine they may even sound shrill, perhaps a bit crackly or crunchy, like you just stepped on a corn pop. The laptop speakers may be a bit better, but you probably are having a hard time hearing those lower frequencies. Laptop speakers tend to have a fairly thin sound, regardless of quality.
This can be due to a few things, but the main issue you run into with these tiny speakers, is that they have tiny drivers. I touched on this in part one when I spoke about why I don’t recommend earbuds for mixing, and a similar string of logic applies here. Small drivers simply aren’t ideal to mix on.
To understand why, you need to understand how the driver of a speaker works. There are nine components to a standard driver (excluding the Basket that attaches it to the speaker):

The diaphragm (the cone)
A magnet
The voice coil
The dust cap
Top plate, back Plate, and pole piece
The spider
The surround
You might recognize some of these pieces from my diagram of microphone internals in part two, and that is because dynamic microphones and speakers are pretty much the same device. You can even turn a speaker driver into a microphone, simply by soldering on an XLR (microphone) cable! You may also do the reverse; though you may destroy your microphone in the process.
Each of these components has a very simple job.
The Cone is designed to move the air backwards and forwards to create sound waves. If you have ever pushed water around with your hand, this is largely similar to what the Speaker cone is doing, but with sound waves.
The Magnet is there simply to provide an unchanging magnetic field for the voice coil to interact with. The strength of the magnet determines what frequencies the speaker cone can effectively reproduce.
The Voice Coil is, as you may have guessed, a coil of copper wire. When electricity is sent through this wire it becomes an electromagnet. The audio signal flows through this coil in the form of an alternating positive and negative current. This is what causes the speaker cone to move, and therefore make sound.
The Dust Cap is placed in the middle of the speaker cone, and prevents dust from reaching the internals of the driver.
The Top piece, Back Plate, and Pole Piece are all magnetically conductive parts that help to concentrate the magnets flux (the magnetic field) around the voice coil.
The Spider and The Surround are both there to support the pieces of the driver, and to ensure that the speaker moves front to back, and no other direction.
So, what does this actually tell me about tiny speaker drivers? We know that the magnet and the speaker cone are our determining factors for what frequencies can be reproduced accurately. I can then apply this knowledge to smaller drivers, and draw the conclusion that the magnet is too weak and small to accurately reproduce most of the frequency range humans can hear, and the speaker cone is too small to really even be able to push those frequencies out properly.
This is the opposite with subwoofers. Their magnets are large and strong, and their cones are often massive compared to the more standard cone size (typically 10-15 inches in diameter). This makes it near impossible for subwoofers to reproduce frequencies above a certain point; that point varying with the subwoofer of course.
Surely we would like something more in the middle for our studio monitors.
Assuming you’re in a smaller - medium sized room, I would look for something with a 5-inch to 6-inch main driver —I say main because they will come with a high-end tweeter, which is just a small driver that is only being used for high frequencies. This is probably the best use of these smaller drivers. If you’re in a medium-large sized room then you may want to look for something closer to 7 or 8 inches, though for most people, this is far too big for what they need.
Sealed, Front-ported or Rear-Ported speakers?
When the driver is moving, specifically when it moves backwards, it is also causing air movement inside the speaker cabinet. This doesn’t mean that the air needs a place to go, and it doesn’t mean that this moment is going to cause any issue within the speaker cabinet. What it does mean is that there is sound coming out of the back of the driver. When you add a port —a long hole cut into the speaker cabinet— that sound is given an opportunity to escape and reach your ears. Typically, the port will be tuned to enhance the bass of whatever you’re listening to.

The main difference between Front-ported and Rear-ported speakers (besides the location of their ports), is that front-ported speakers can be placed significantly closer to the wall before your low frequencies start to become a bit too boomy. Placing rear-ported speakers too close to the wall will more than likely end in an overwhelming and possibly distorted bass. There are of course speakers that have been designed to accommodate for this, however I consider those to also be more for casual listening.
While it is very possible to mix on ported speakers, I prefer sealed speakers for this task. This is for the same reason I don’t like to work on sound using my headphones meant for casual listening—I don’t want a speaker with any kind of bass or high-end enhancement. Enhancing bass is essentially what a ported speaker is doing. This makes ported speakers a great option for home theatres, casual listening, and gaming, but not so much for professional audio production.
So long as you know your answer to both these questions, you’ll likely find it quite easy to find monitor speakers you can both enjoy and work on. There are plenty of numbers and specs you'll run into. For now you don't have to know what any of it means. The only other thing you might run into is the question of active or passive, however most studio monitors will be active; and I would highly recommend, that should you run into a passive pair of studio monitors, avoid them. This is because passive means there is no internal power, and you will need to purchase an external speaker amplifier to make them function. This doesn’t make them bad by any means, it just an additional cost and additional space taken up by something that wouldn’t need to be there otherwise.
Here is a small list of some speaker companies if you’re still unsure where to start. These are all reputable companies that are available within Canada, at varying price points. For the sake of transparency, none of these companies have paid MOSMA to promote their brand, this is simply what I have encountered in my own research and experience:
Genelec
IK media*
Dynaudio
KRK
ADAM Audio
Yamaha*
Yorkville Sound*
Kali Audio
JBL
Avantone Pro
And there are of course, many many more. Many of these brands also sell good speakers for casual listening. I have put an asterisk beside each brand that is particularly beginner friendly.
You may also want to look into some sort of speaker stand, or monitor isolation wedges, which is a very long name for what is just acoustic foam cut at a specific angle. These are helpful to bring your monitors up to head height, or direct them towards your ears, when you’re mixing. You want this, because you could very easily miss something (it could literally slip by); or more notably, you might start hearing a bunch of unwanted reflections.
A reflection is when a sound bounces off of a hard surface (soft surfaces absorb) before it reaches the listener. This I find easiest to hear when I am standing next to glass or a mirror while chatting with someone. Often their voice will hit the glass or mirror first, then my ear on the side of my head furthest from whoever I am chatting with. At times it has sounded like they were actually speaking to me on that side. Other times it has added a metallic ring to their voice. This change in sound quality is a massive reason why we want to eliminate reflections in audio workspaces.
Echoes are actually reflections. Probably the loudest reflections you will ever encounter. This is also why you hear them in caves or canyons, but not when you yell through the prairies—unless you’ve got hard surfaces nearby, of course. I'll explain reflections more thoroughly in a future article, however the topic of acoustics is expansive to say the least.
What kind of cables will I need?
In this particular set up, you will need cables for two things.
The first thing is connecting your interface to your monitor speakers. What type of cables you will need will depend on the output jacks of your interface, and the input jacks of your monitors. Typically, interfaces will use TRS (tip, ring, sleeve) outputs, or XLR outputs. That is pretty standard across the board. Monitors can have an array of different connections. Thankfully the number of different connections is greatly brought down when looking at professional monitors, but you could still run into three different types of input; XLR, TRS, or RCA.

This is nothing to fret over. It’s easy to find cables that have two different jacks. You’re just looking for an adaptor cable.
For the length of cable, I would try not to go too crazy, as your monitors are likely to sit fairly close to your interface and computer. You are probably looking at 3ft to 10ft depending on how high your speaker stands sit, how far away your speakers are, and where you choose for your interface to sit. It’s always nice to have a bit of extra cable length, as you can always wrap it up to keep it out of the way. Too much length can get a bit bulky and messy. If you’re not certain, the easiest way I have found to measure my cable lengths is a seamstress measuring tape. They’re cheap, flexible (so you can measure around the back of your desk), last for ages, and you can find them in most craft stores.
The only other cables this set up would absolutely need, are XLR and/or TS cables (instrument cables). When I spoke about microphone stands, I recommended you get one per microphone; when thinking about cables, however, I tend to think about the number of inputs on the interface.
If I only have two microphone inputs, I wouldn’t bother to purchase more than two or three cables, even if I have 5 microphones I do intend to use. This is because regardless of how many microphones I have, I still don’t have the space to plug them in, so why would I not just switch out the microphone, or have the other microphone ready to plug in when I need it? Having one spare can be good, but if you’re buying decent cables —which I will go into in a moment—and caring for them well, you likely won’t end up using that spare for a long time. It is nice to have extra to limit the amount of wear and tear on your cables, but that’s not a necessary thing to do if you don’t want to, or if you just don't have the money and/or space.
You will want to have one or two extra microphone cables if you plan to use a DI (Direct Injection) Box. These boxes are used —at least in the studio. They do have other uses— to obtain a clean, clear signal from electric instruments. They eliminate ground hum, a noise that many (most) electrical systems emit, due to ground loops (also known as an earth loop). This noise sits at exactly 50Hz here in north America.
Now you could either do your best to have each piece of gear on a different outlet, as this would eliminate the ground loop, or you can get yourself a DI Box and not have to think about it.

Instrument cables are a bit different, because they are the standard for most electric instruments. The most instrument cables I have ever needed to record one electric guitar is three. One to go from the instrument to the DI. One to go from the DI to the pedal board for the dirty signal —Dirty meaning with effects. Then one to go from the pedal board, into an Instrument input on my console channel (in your case it would be the interface), or into the amp. Because I used the DI, I was able to obtain a clean signal from the guitar, should I want to mix that in, add an additional guitar track, or save a guitar track that got recorded incorrectly. This is where that additional XLR cable comes in handy. It connects the DI straight to your interface or console.
This is a common set up for any electric instrument. The number of cables required for a particular instrument will, of course, very. Keyboards typically will only need two. I will also try to record the MIDI data of a musician’s performance straight off the keyboard. It may not get used, but it can save a lot of time if you're not sure what keyboard tone you would like.
What about cable quality?
It’s not an uncommon thing to forget the importance of quality in the gear we purchase, especially when we are talking about cables.
The thing is, bad cables make noise; and really bad cables make a lot of noise. I have seen it time and time again, where someone will purchase the cheapest cable they can find for the sake of saving money, and they end up returning it the next day because it’s too noisy to work with.

This also affects how long your cables last. I have known people who, because of their desire to not spend as much, have ended up having to replace all of their cables more than once in the short time I knew them, purely because they refused to buy anything other than the cheapest option they could find. When you have an entire mixer set up with several sets of speakers, this repetitive purchasing very quickly becomes more expensive than if they had just purchased something of at least some sort of quality in the first place. You don't have to buy the most expensive cables —and I would avoid those as well— but to a certain point, you do get what you pay for.
Good cables should last you years in a studio environment. I look for cables with jacks that can unscrew (see figure 7), so I can actually repair them, or reuse the ends if the cable has broken in the middle somewhere. While I don’t like to be specific about brands, Amphenol and Neutrik are quite possibly the kings of the audio connection world. Their connectors, combined with a sturdy 18-24 AWG (American Wire Gauge) audio cable, is all I truly look for in my audio cables.
I aim for simplicity. You don’t want an overly complicated cable. Over complications in cabling tends to either cause problems, or just be nonsense made to sell you something for far more than you should ever have to pay.
How do I set this all up?
Finally. You have what you need to get started recording, editing, and mixing your own music! Now to set it up, I recommend putting everything else to the side, and just start with your computer, and your interface. I've done my best to break up the steps, while still providing enough detail that errors can be either avoided or solved easily by someone just starting out.
Step 1: Installation of your drivers
First things first, you need to see if you need to install your interfaces drivers before plugging it in, or if it automatically begins installation when you first plug it in. I believe I did mention this previously, but to refresh: a driver, in this case, is a piece of software that allows your computer to communicate effectively with your interface. If you don’t install these, your computer won’t even know your interface exists. You can find this information in the manual.
Install Drivers as directed by the manuel.
Step 2: Plug your interface in & test
You can choose to use computer power or wall power for most interfaces. The only difference is that computer power will require the computer to be on for the interface to function, whereas with wall power you can run your interface anytime you please. Wall power is useful for those who like to play the instruments through their studio monitors instead of through an amp.
I recommend that the next thing you do is go into your computer settings and change your preferred audio output to your interface.
Once you’ve ensured that your interface is your preferred audio output, plug in your headphones, turn it up, and try playing some music through it. If there is no sound, the most likely issue is that you will have to go into the settings of whatever application you're playing your music off of, and once again change your preferred audio output setting to be your interface. This is often one of the first things I check now when I can’t hear sound.
If you open an old session on a DAW, it will have maintained the I/O (inputs/outputs) that it had before you plugged in your interface. When I run into this when I transfer between studios, what I do is I first wipe my I/O settings, swap my preferred audio input/output, and allow the I/O to be filled in automatically. Just be careful not to wipe any of your sends/buses.
This will mean you may have to choose where everything has to go again, but while a little tedious at times, it is pretty easy.
Step 3: Interface placement
As long as you’re able to reach the volume and gain, there isn’t an objectively wrong place to put your interface. To the left of your monitor is probably the most common. I don’t see many people put it to the right, but those who use a left handed set-up may prefer it there. Mounted below the desk, with heavy duty Velcro or brackets, is another common method I have seen, though this doesn’t work well if it is in the way of your knees.
Step 4: Monitor Speaker + Stands placement

Don’t worry about plugging your speakers in quite yet, as you will be moving them. If you would like to be as precise as possible, grab yourself a regular measuring tape (I recommend one that locks) and a protractor.
Your goal here is to create an equilateral triangle with the two speakers and your head. You may recall from middle school math class, that an equilateral triangle has three equal sides, creating three 60° angles.
With this goal in mind, I like to start with a rough placement of the speakers. I do this while sitting or standing in front of my computer so I can get a better idea of the angles. This also allows me to ensure that when I am done placing my speakers, the computer I will be working on sits central between the speakers.
This task tends to have some trial and error involved, so be sure to give yourself time. A good start is placing your speakers roughly two feet apart, and angled towards your head. When you check to see how close this is to your desired outcome, measure from the tweeter (the smaller speaker driver). You can mark where you sit with an object if it will make it easier. If you have chosen to have taller speaker stands so you may place them behind your desk, keep in mind that your triangle will be a bit larger. In this case, start at something more like three feet apart.
Measure and make adjustments as needed. A good way to go about this is to measure after every adjustment. You may also need to adjust the height of your speakers stands.
Step 5: Testing your speaker placement
Now it’s time to plug in your speakers. Make sure you’re plugging the right speaker into the right output and the left speaker in the left output of the interface. Also be sure to plug in the power cables and turn them on.
Choose a piece of music you know well, and put it on. You’ll want your speakers to be at a decent volume, but they don’t need to be super loud (70 dB to 80 dB is the recommended volume for long term listening). When you listen, what you’re trying to hear is what we call the Phantom Centre. The point where, even though you have only two speakers, it sounds as if there is a third one directly in front of you. This may be subtle at first, or you might not hear it at all. In these cases, there are still some adjustments to be made. Keep the music playing, and ensure to listen to it as you you’re your adjustments. A perfect phantom centre doesn't exist. You do want the vocals to be heard in the centre, and in many cases, the bass is panned central as well. Knowing this, you can use these instruments to help place your speakers.
Once you have found your phantom centre, your monitor speakers are set!
Step 6: Personal Vocal Mic Placement
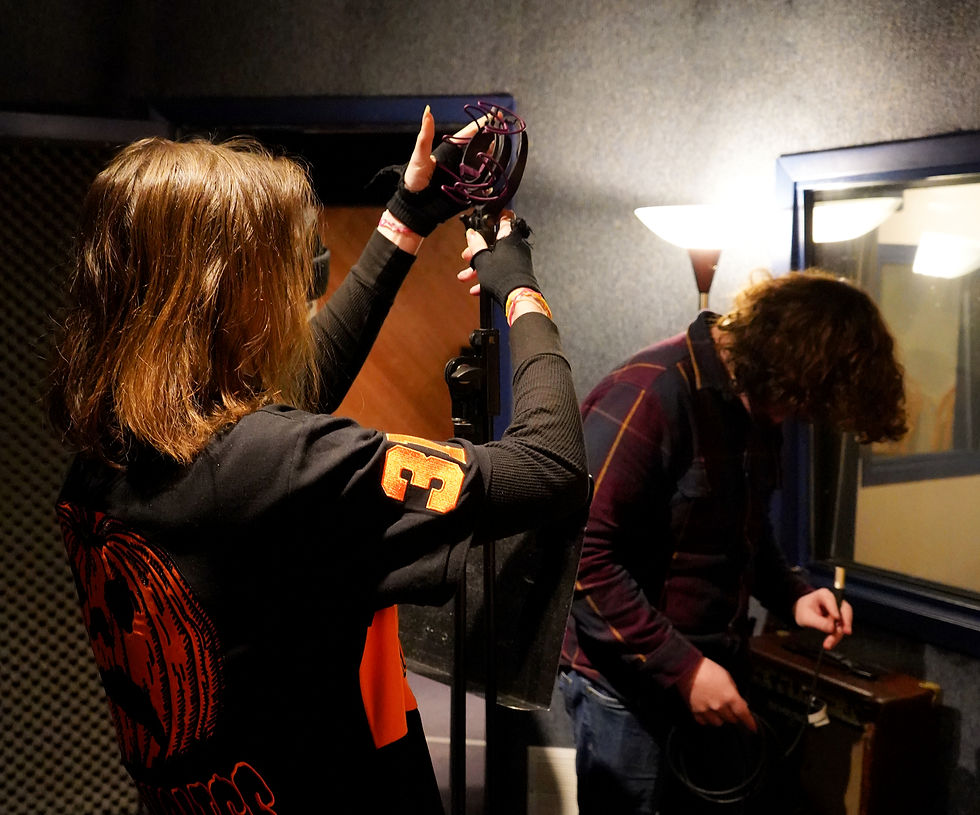
You’ll want a short microphone stand, or you can always opt for a boom arm that can attach to your desk or wall. I will often choose to place this on the side of my non-dominant hand, to keep it close to my interface and to prevent myself from bumping it when I move my mouse.
When setting microphones, it is good practice to put the clip or shock mount on first, and then the microphone. This will prevent you from dropping and breaking microphones.
When you place a vocal microphone, it will often sound better if it has been placed at a slight angle (off axis), with the diaphragm still directed towards your mouth. This will help eliminate sibilance (your ‘ssss’ and ‘ffff’ sounds) and plosives (your “puh”, “chuh”, and “tuh” sounds). You also want to maintain a bit of distance between your voice and the microphone, or else you run into what is called proximity effect —an excessive boominess that is caused by being too close to the microphone. This does not have to be perfect until you decide you wish to record it, in which case, beauty remains in the eye of the beholder. Do what sounds good to you.
Place your pop filter roughly two inches away from the microphone where it will help to control any excess air leaving your lungs as you speak. You’ll get a feel for what is the best placement for your voice as you work with it more. Don’t be afraid to experiment and make adjustments
When you feel happy with the rough placement, grab an XLR cable, and plug it first into the interface input, and then into the microphone. The end that plugs into the microphone should click so you know it is properly connected. Always complete a connection before moving onto the next. In this case there isn’t any practical reason why you must plug it in, in this order; however if you intend to ever go into a studio, this is an excellent habit to have already established. It will save you from mixing up which microphone is in what input, and it will also save you from not plugging in a microphone accidently.
Step 7: Testing your microphone
Open a new session on your DAW and create an audio track
Make sure your input is set to the same input your microphone is plugged into, and make sure your output is indeed your interface. If your microphone is a condenser, ensure your phantom power is on. It is usually a little button near your inputs, labeled 48V.
Make sure you are monitoring your input. This is a little button most DAWs have that allows you to hear the signal coming into a channel without recording it. Make signal (sound) into the microphone, and start to bring your gain up until you can hear it. This is called a line check
If you’re having no issue hearing signal from your microphone, then congratulations! You have successfully set up your own basic home studio! If you're encountering issues, then walk through the steps again and ensure that you haven't missed anything. If you haven't, than you can look your specific problem up and it will likely give you the solution. Sometimes it can take a bit of digging, so don't give up too easy. If both of these fail, then feel free to reach out to MOSMA or anyone else you have in your life who may have a solution, or when in doubt, restart your computer.
But what about the rest of the room?
While you don’t absolutely have to treat your room, it is highly recommended by myself, and any other musician or engineer you may speak to. Audio waves need a medium to travel through to get from point a to point b, and in this case that medium is air. The purpose of soundproofing your room is to limit what audio gets to travel through the air and into your ears. Unwanted frequencies may not even be in the project you're working on. They may just be a reflection you're hearing off your wall. Now before I scare anyone too much with that, an easy way to tell is to go back to where you heard the unwanted frequency, and to listen to what direction it's coming from. A reflection isn't going to come from your monitors.

Soundproofing your room could look like inputting your room measurements into a calculator that automatically tells you where you may need treatment in your room, or it can mean carpeting absolutely everything. There are a few ways to achieve a better sounding room.
The first thing I would tackle would be the corners, as they are pretty simple. Bass traps are an excellent way to prevent the build-up of lower frequencies, and you can make them yourself from foam, or fabric and some plywood if you’d like.
You can either place them at the top of the room’s corners, top and bottom, or you can simply have a floor to ceiling bass traps. I wouldn’t worry too much about what may be behind your set up. So long as your speakers are far enough away from the wall, then you shouldn’t have any issues.
As for the rest of your walls, there are a number of things you can do here. The first and most obvious one is the use of traditional acoustic panels. These come in foam, and wood, and are usually heavily textured, so to further dampen the sound.
Placement can be tricky, but what you’re looking to do with this is eliminate reflections. Take a string or measuring tape, and start at one of the tweeters of the monitor speakers. Ensuring that you’re keeping that angle, make your way towards the wall. Make a mark there, and repeat for the opposite wall. This tells you roughly where your first reflections will land, therefore telling you where you need to put some acoustic panelling. Make sure these panels aren’t small either. You want them to cover a good amount of space.

Other good locations for acoustic panelling include above the mix position (where you sit) and on the wall behind your seating position.
Other options to dampen sound, include books, blankets, pillows, and carpet; sound is absorbed by softer materials. In addition to this, the more lumps and bumps and spikes these treatments have, typically the better. Flat, even surfaces tend to cause more reflections, and therefore more issues within the room, so the more we can eliminate that, the better.
With the addition of room treatment, you will notice a significant increase in both the quality of your recordings, and the quality of your mixes. And this is only just scratching the surface of audio science and technology.
Thank you very much for reading, and I hope you enjoyed! Please feel free to reach out with any questions. Next month I will begin to tackle microphone placement, starting with guitar and bass amplifiers!
Stay tuned for Aprils next issue!

