A Beginners Guide to Microphone Placement: Guitar & Bass Amps
- Apr 13
- 14 min read
Written and Edited by: Saige E. Davidson, MOSMA Outreach Coordinator, 2023 Alumni
Published: April 13th, 2026

The placement of your microphone directly affects the timbre of the sound that is picked up in your recording. A little nudge here or a little bump there, and you’ve gone from a punchy kick drum to what may just sound like loud puffs of air. When you have an understanding of microphone placement, and your microphone(s), then you can use them like an artist may use different shades of paint or different brushes. Yes, it is very technical, but it is also incredibly creative. One shade of blue may have the wrong undertone, but perhaps mixing in a bit of yellow may make it feel harmonious with the painting. This is a huge part of what I love so much about audio!
When I originally started writing this I was going to speak about rules, and how in context they may become irrelevant to your project; but then I left this train of thought to marinate in my mind for a while. I now find that I’m disagreeing with myself on what defines a rule, and on exactly how many 'rules' are genuinely rules at all; or if they have just become common knowledge as the result of someone's process being idolized. Ultimately I was previously thinking about Recording as a whole, and not just the intended purpose of this article.
Recording has rules, and those rules are there to protect you, your equipment, and sometimes the quality of your recording. Mic placement has a theory, much like any of the arts. Theories in the arts, while made to be good guidelines to what most people find pleasing, are ultimately not rules.
For this reason, I can’t tell you exactly what is going to sound right for your project; and trying to do so would in all likelihood end up actually inhibiting you, rather than helping. I can, however, give you a place to start.
Why Start Here?
Every instrument requires a slightly different approach due to things like its overall structure, its timbre, where it sits in the room. I also consider any other instruments in the room, and the style of music being played. Something that is recorded live off the floor will require a different approach then the band that wants to record everything individually, and the kick mic of a pop song probably isn’t going to be the same timbre of the kick mic in a jazz song—or it might be perfect! You don’t actually know until you try it.
The first thing many engineers learn to mic up is a guitar cabinet or combo amplifier. It’s probably the easiest way to show exactly how the placement of your microphone can change the sound recorded, and that’s because of a few reasons.

The first is that it is incredibly easy to see relationship between the speaker cone and the placement of the microphone. Something like drums —or any sort of acoustic instrument, really— can make it harder to visualize exactly how far away, and at what angle the microphone sits. You’re no longer working with a consistently flat, unmoving surface. I will cover drums, and many other instruments, in future articles; as they all present their own challenges.
I remember quite vividly how intimidated I was when I had to mic up my first drum kit alone. I just stood there for a bit and stared at the kit, trying to decide what I needed to do, and as the panic started to set in I realized I either had to just go for it; or give up.
That recording came out pretty alright if I recall correctly.
The second reason is that it is relatively consistent. Meaning you can set it to a volume and it will (generally speaking) stay at that volume until you change it. For many instruments, if you don’t have a reference for loudness, it can be quite difficult to match the loudness you previously had. This isn’t ideal for beginners, as they are unlikely to be used to this, and may assume it is due to the change in the position of the microphone, rather than the intonation of the musician, or vice versa. This is a normal part of the learning process, and it takes time and practice to develop those critical listening skills. The last thing I’d like to do is make someone feel discouraged because they can’t hear something I —someone who has been doing this for years— can hear.
The last reason is that guitar is far more familiar for the majority of people. Many people who are interested in recording and audio technology already have some experience with an instrument. The level of experience varies, but regardless, you are far more likely to have someone in the class who can somewhat play a guitar to record and compare to the other signals you have recorded. More importantly, this familiarity may also help make it easier for someone just starting out to hear what is changing when the microphone is moved.

It’s often much harder for a beginner to hear these changes, and so to help train the ears, we start by trying to make whatever we are showing as obvious as possible, and then we turn it down. I mention this because it can be daunting, and even potentially embarrassing for some, when you can’t hear the thing that everyone else can. I know I have judged myself in the past for this exact thing, and I now see others doing the same. I promise you that if you keep working at it, it will come. Learning isn’t anything to ever be ashamed of or embarrassed by, and patience with oneself —while often difficult— is an invaluable skill.
What microphone should I use?
Going back to when I spoke about microphones for vocals in my previous article, you’ll want to consider a few things before deciding on the best microphone for the job.
Style of music is going to be a huge influence on this, because this will directly affect the amount of gain —the level of input signal being allowed to flow from the guitar/bass to the amp, often affecting distortion— a musician will use for their guitar or bass. A Black Metal song, for example, is going to have far more gain than a Classic Indie-Rock song. In addition to gain level, this also affects the amount of distortion and drive that will be layered onto the guitar or Bass tone.

All of these effects end up making the tone of the guitar or bass typically louder and crunchier. Amps will allow you to turn the volume down, yes, however if it is too low, it can affect the instruments tone. The potentiometers (The electronic component of guitar knobs) of amplifiers have a tendency to be far less precise than those on digital plugins; and even when compared to outboard studio gear.
In addition to this, it’s just fun to play instruments loudly sometimes, so when working with musicians —particularly as a musician myself— I am inclined to just let them do their thing and I'll work around it to the best of my ability. There are of course technical limitations to how loud they can go, but that depends on your room, your microphone, your ears, and so on. These are all things affected by amplitude (loudness).
The next thing I am going to consider is how dark or bright the guitar or bass tone is.
Here is an excellent example of an artist that regularly uses a brighter guitar tone:
The high end of his guitar is almost crispy, which works well with the music that he creates. It’s not shrill, but with the wrong microphone and microphone placement, you could certainly get there. It is almost entirely string noise, and he has achieved this using some really interesting digital processing, with minimal to no amp sound at all.
Here is an example of a much darker guitar tone:
We are not only dealing with more strumming in this particular song, but also far more mid-range warmth. There is less clarity, and while that will partially be distortion, that will also be due to a number of things, such as what guitar was used, and what was on the pedal board itself. It is also to do with how that song was recorded and then mixed. This is a very classic indie-rock tone.
I’d like to clarify something. I often run into instances (particularly online) of people saying something “sounds dark” and what they’re actually referring to, or what they’re actually hearing, is the mode of the song. Not too get to into music theory, but a Mode, in this case, is when you take a traditional seven note scale and slightly alter it, causing a change in the mood of the piece. While most people i've heard or seen these terms from were not technically incorrect, this isn’t the context I am using it in. I am purely referring to sound, and sound alone.
In the context of Audio Engineering, dark means complex, warm, often more mellow. Think of silver brass instruments and flat wound bass strings. I find that most genres —or rather, most songs— have a blend of darker sounding elements, and brighter sounding elements. .
For the first song I shared, I would actually reach for a condenser. Something very neutral (transparent) sounding. Due to this song having that hyper-modern, progressive metal sound, I don’t necessarily want my tools to add or subtract anything in the recording. I want my recording to be as clean as possible.
I would also have a slightly darker microphone at the ready, just in case we are having some problems with shrillness. It may not be necessary, but it can be nice to have the option so you know that both yourself and the artist —or just you— are certain of the choice. One may even use both microphones and blend them together in the mix.

If you get into how he actually recorded it, you’ll find that he doesn’t utilize microphones at all; instead running his instrument directly into his interface. This is an incredibly common practice, especially amongst home producers, as it is generally easier.
While these are only two examples, I hope they help illustrate to you the thought process behind these choices. The more you do it, the better you’re going to become at picking the right mic for the job!
Where do I place it?
The simple answer to this question is to place it wherever it sounds good in context, however that is only really helpful when you’ve already got a bit of experience under your belt.
When we talk about guitar and bass amplifiers, we are talking about a type of speaker. Sometimes that speaker is made to be passive, which is when you start to see your amplifier being separate from your speaker cabinet (amp heads); and sometimes we are talking about the somewhat more common combo amplifier, which —like active monitor speakers— is when the amplifier is built into the speaker cabinet. This ultimately doesn’t mean much from a recording perspective, however it is important to note that when connecting an amplifier head to a cabinet, be absolutely sure to use a speaker cable unless you’re really confident with a fire extinguisher. That is to say that it can and will set the amp on fire if you don’t use the right cable, so this is one of those genuine rules you’re going to run into.

If you read my previous article, you know that the drivers will be the source of the sound. Following that logic, you may or may not have already put together that we will be using the speaker cone as a guide for our placement.
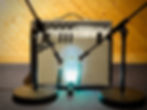
We only need to look at three parts of the driver to do this. It's unlikely you'll be able to see through the speaker baffle (the front layer of the speaker), so a flashlight will be your best friend for this. Place it right up against the front so the light isn’t being diffused. I find that I have to get pretty up close and personal with most amplifiers. This is also partially because I am trying to see the distance from the driver to the microphone, because this will also affect the sound.
Due to them using a lot of black, and dark grey for the baffles of bass amps, I sometimes have more issues seeing the speaker cone. The black and grey tend to blend with the driver.
When you know you’re able to get a clear look at the driver, I would like you to try and identify the three visible parts. The first part is the dust cap. This is at the very centre of the driver, and keeps dust and dirt from making its way inside the driver. Right in the middle of this will be your brightest sounding point.

Next, I want you to identify the raised ring that encircles the edge of the driver. This is called the surround. Its purpose is to prevent the driver from moving around unnecessarily. This is the darkest sounding point.
Between these sits the speaker cone. This is the piece that actually creates the air movement that then pushes out the soundwaves. This is the area we will be miking up.
That’s not a rule, of course. You can place your microphone however you wish. Here is the theory though:
The dust cap being the brightest point of the driver and the surround being the darkest point of the driver means that the cone is quite tonally diverse. If we need a brighter, crispier tone from that guitar or bass, we will typically place it closer to the dust cap, still keeping much of the microphone capsule pointed at a part of the cone.
Pointing your microphone directly at the dust cap can be good for certain songs, but is generally too harsh for most genres. I encourage you to try it, and hear for yourself how it sounds!

If we want a darker, rounder sound from the amp, we will start to move that microphone out from the cone, closer to the surround. Pointing your microphone at the surround is something I recommend trying at least once, so you can hear for yourself just how dark and muted the instrument becomes. If you’ve ever played an electric bass with flatwounds, or have listened to someone play, it is actually very similar to what this microphone placement can do to a normal bass guitar tone.

Typically, I will set my microphone somewhere on the cone between the cap and surround, leaning a bit on the brighter side. I will often choose an even brighter placement for bass. This is for a couple of reasons. One is that a certain amount of that bright, sort of sparkly, sound is quite favourable in much of popular culture right now; across many genres. I can’t blame anyone for enjoying it, because another reason I choose that particular placement is because I like it. I think it sounds good.

Another reason for this to be a rather frequent choice of mine actually stems from my future mix; or the future mix depending on if you’re even the one mixing it in the end. While it is true that I detest different parts of my process crossing over into each other, I think it is also fair to say that considering my next steps when making these choices is more likely to result in a project with a clear, discernible vision. Making these choices now also saves time for both the client and one’s self later, because you’re not spending a bunch of it trying to brighten or darken your guitar and/or bass while mixing.
It's okay not to be spot on, but trying to turn frequencies up that simply are not really there can be extremely difficult, and you’ll end up down this rabbit hole of harmonizers, and equalizers, and spectrograms and so on, because you’re trying to make this sound more like what you or the artist wants it to, but it just doesn't seem to want to cooperate. I've been on this adventure a few times, and it can really suck the fun out of mixing if you let it go on too long.
The purpose of a good recording is to not only save you time and energy, but also to create a good quality end product that those involved can feel happy with or proud of.
What if there are two drivers?
You will see this mostly with guitar amplifiers. Guitars demand a certain amount of width to their sound, as well as amplitude. For this reason, many guitar amps will have two drivers.
Bass tends to be focused on clear reproduction of lower frequencies, hence bass amps having typically one larger driver. We don’t have to worry about amplitude as much with a bass amp, because lower frequencies produce larger waves which we in turn perceive as louder. This is also why if you need to feel more push from your bass or guitar amp, you can try just turning up the bass knob first and see if that does it.
When faced with two drivers, your first instinct is mostly likely to do exactly the same on the other side, which is great! Assuming you’re using the same microphone model, and you’ve placed the microphone the same distance away from the cone as its twin, this would be considered what we call a stereo recording method. I will go more into that on my next article, but in essence, if you would like your electric guitar to sound extra wide, do this, pan it left and right, and you will have a huge sounding electric guitar. I love this for genres like power metal, where everything has to sound really big and dramatic.
The thing about stereo is that you have to use the same microphone model, and if you want true stereo, they have to have been made next to each other in the factory—This is also known as a Stereo Pair. I find that on guitar it can sometimes be a bit limiting, and not everyone owns a stereo pair, so my current preferred method is what we call multi mono. Mono recording in audio technology means to use one microphone on your source signal, so multi mono means multiple different microphones —potentially in very different positions— to mic up a single source.

I find that this method can give me a bit more control over the guitar in the mix, as mono guitar recordings tend to have a much narrower sounding signal, making it easier to position on the imaginary stage in front of me. Mixing a stereo guitar recording can sometimes be like trying to carry a big, awkward box. It doesn’t matter how light it is, it’s still big and unruly and awkward to carry. In addition to this, multi-mono recording allows me more control over the final tone of the guitar. When I choose microphones for this job, I will usually use a dynamic for one cone and a condenser for the other cone, so that I can then blend them later on.
On or off Axis?
Microphones are typically very directional. With the exception of Omnidirectional microphones, each one will have a pick up pattern that fans out from the centre of its diaphragm.

When you are recording On-Axis, you are pointing the front of the diaphragm (and therefore the pick-up pattern) directly at the source signal. When recording Off-Axis, you have angled the front of the diaphragm —slightly or severely— away from the source signal.
This is where it really comes down to your own ears. What sounds good is up to you and whoever you may be working with. I would start with everything placed on-axis for now, and adjust as you go. You could even make a bit of an experiment with it, and record various placements to see what you like best with various instruments and microphones.
A lot of microphone placement is going to be trial and error; and that isn’t just for guitar and bass amps. Even Alan Blumlein, inventor of stereo recording, spent much of his time trying things and not liking them. It is a key responsibility of the recording engineer to ensure the quality of the recording, and sometimes that means changing out the microphone and/or the mic placement.
Thank you very much for taking the time to read until the end! I hope that you enjoyed it, and please feel free to leave your feedback and share! This the beginning of a new series where we go through the basics of microphone placement for various instruments and related topics. I’ll be covering more on Microphones next, so keep an eye out for that this May!
Happy Spring!
Follow Us!


